[Easy Tutorial] How to enable Google Consent Mode V2 on a WordPress site with the ConsentMagic extension?
Consent Mode V2 allows website owners to customize data collection based on user consent preferences. As of March 6, 2024, it becomes mandatory to enable this mode to remain compliant with regulations such as GDPR.
This article will guide you step by step through enabling Google Consent Mode V2 on your WordPress site using the plugin ConsentMagic.
Why activate Consent Mode V2?
Legal obligation
Regulations like the GDPR (General Data Protection Regulation) in Europe require websites to obtain consent from users before collecting and processing their personal data.
Failure to comply with Google Consent Mode V2 can result in serious consequences, such as the inability to create or edit audiences on Google Ads, target remarketing audiences, and even suspension of your ad account.
Risks in the event of non-activation:
Financial Sanctions: Severe fines may be imposed for non-compliance.
Loss of advertising features: Suspension of advanced conversion tracking and inability to effectively manage advertising campaigns.
Loss of user trust: Visitors may lose trust in your site, which can negatively impact your reputation and traffic.
Understanding Consent Mode V2 settings
Google's Consent Mode V2 works thanks to the integration of four essential parameters:
analytics_storage : Manages the storage of information necessary for audience measurement.
ad_storage : Controls the storage of information dedicated to advertising.
ad_personalization : Allows you to define user consent for personalized advertising.
ad_user_data : Defines user consent for sharing data with Google for ad targeting.
How to activate Consent Mode V2 with ConsentMagic?
Prerequisites
Before you begin, make sure you have installed the Google Tag on your site. You can use the extension Site Kit by Google for easy integration.
ConsentMagic installation and activation
Access your WordPress dashboard : Log in to your site's administration interface.
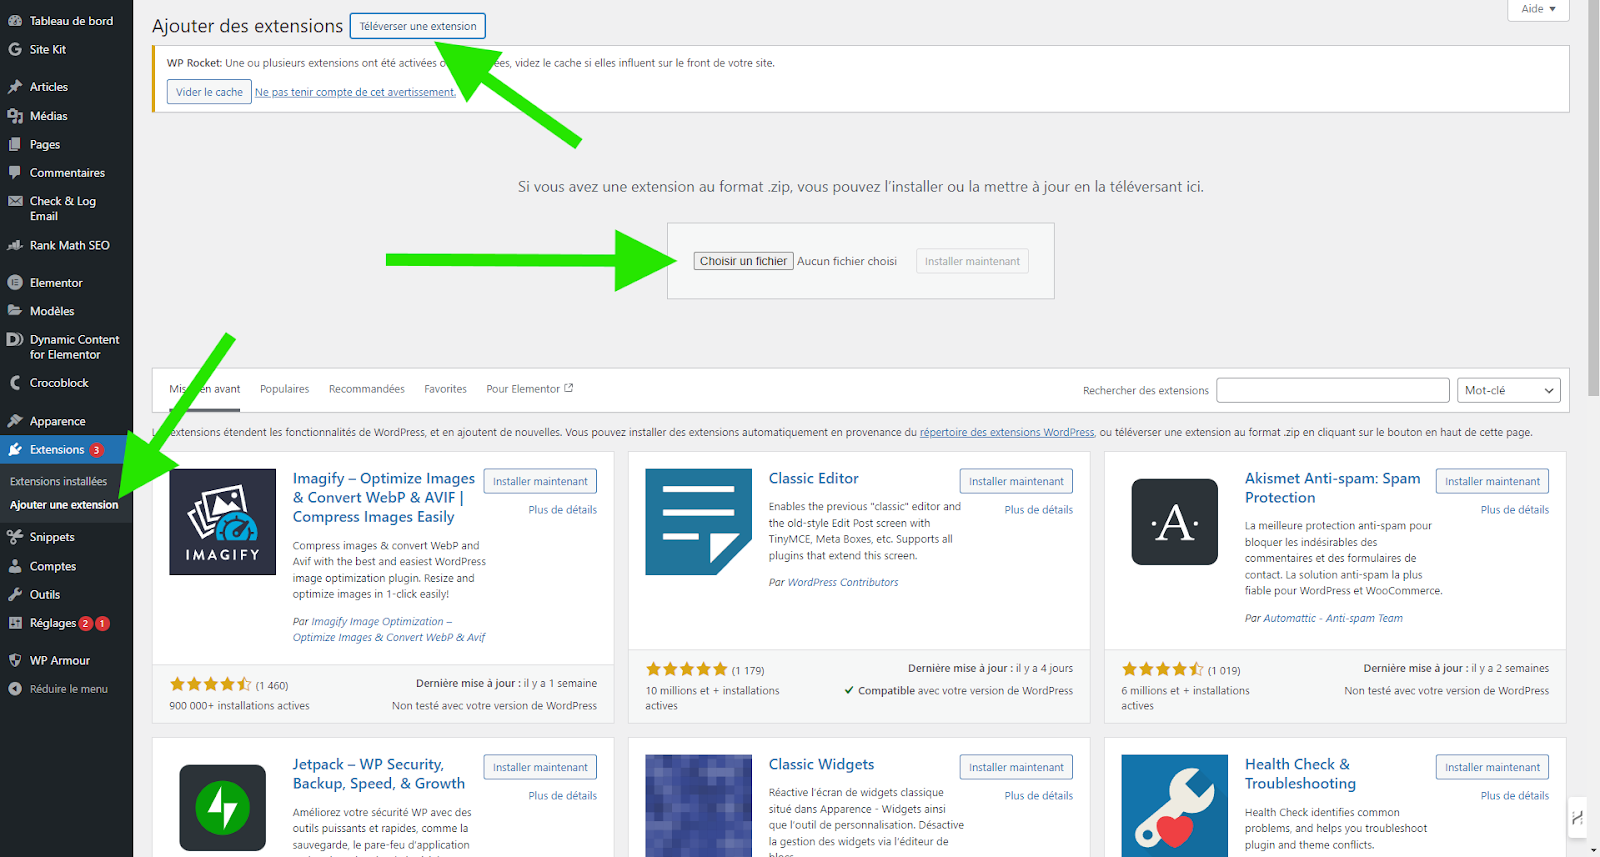
Navigate to the Extensions tab : Click on “Extensions” in the side menu, then click on “Add”.
Search for the ConsentMagic extension : In the search bar, type “ConsentMagic” OR Upload the .zip version of the extension. Once successfully found or imported, click “Install” then “Activate”.
Configuration and Personalization
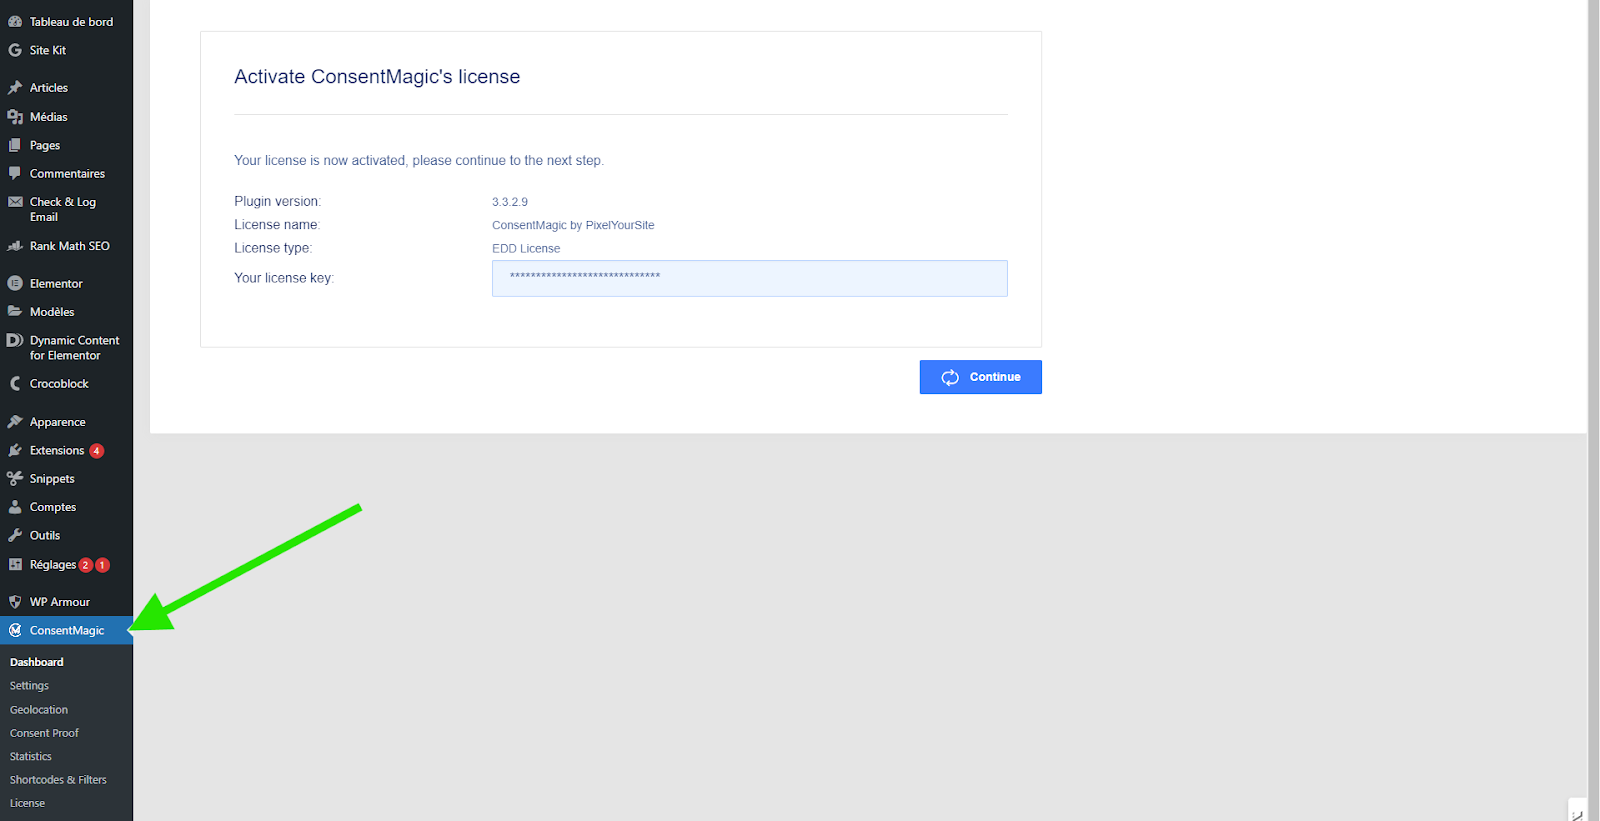
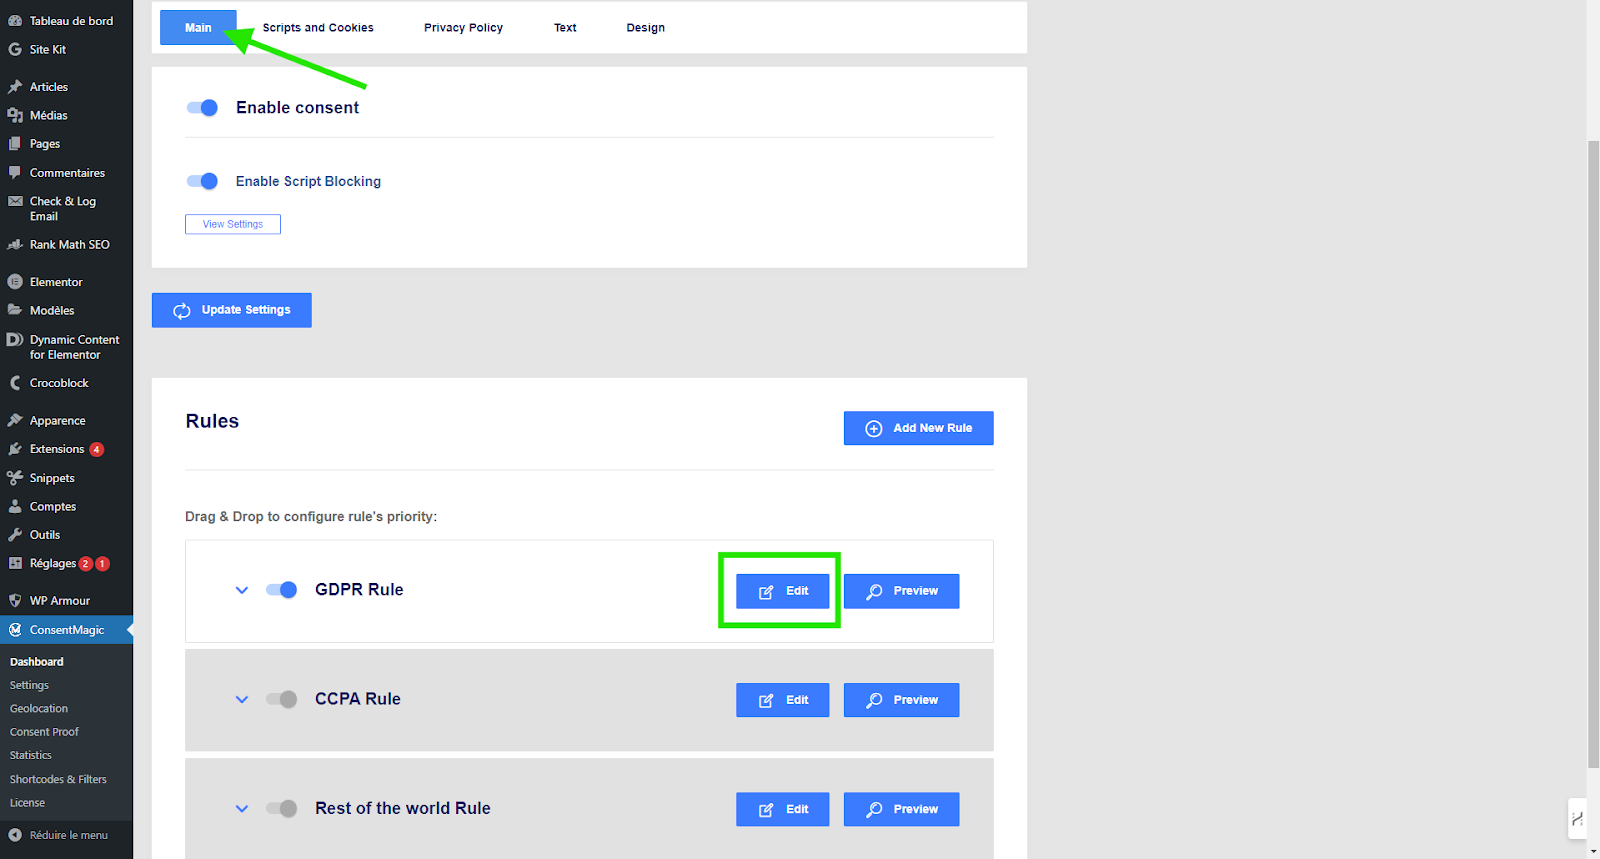
Go to ConsentMagic Settings : A new tab “ConsentMagic” will appear in your side menu. Click on it and follow the prompts for activation.
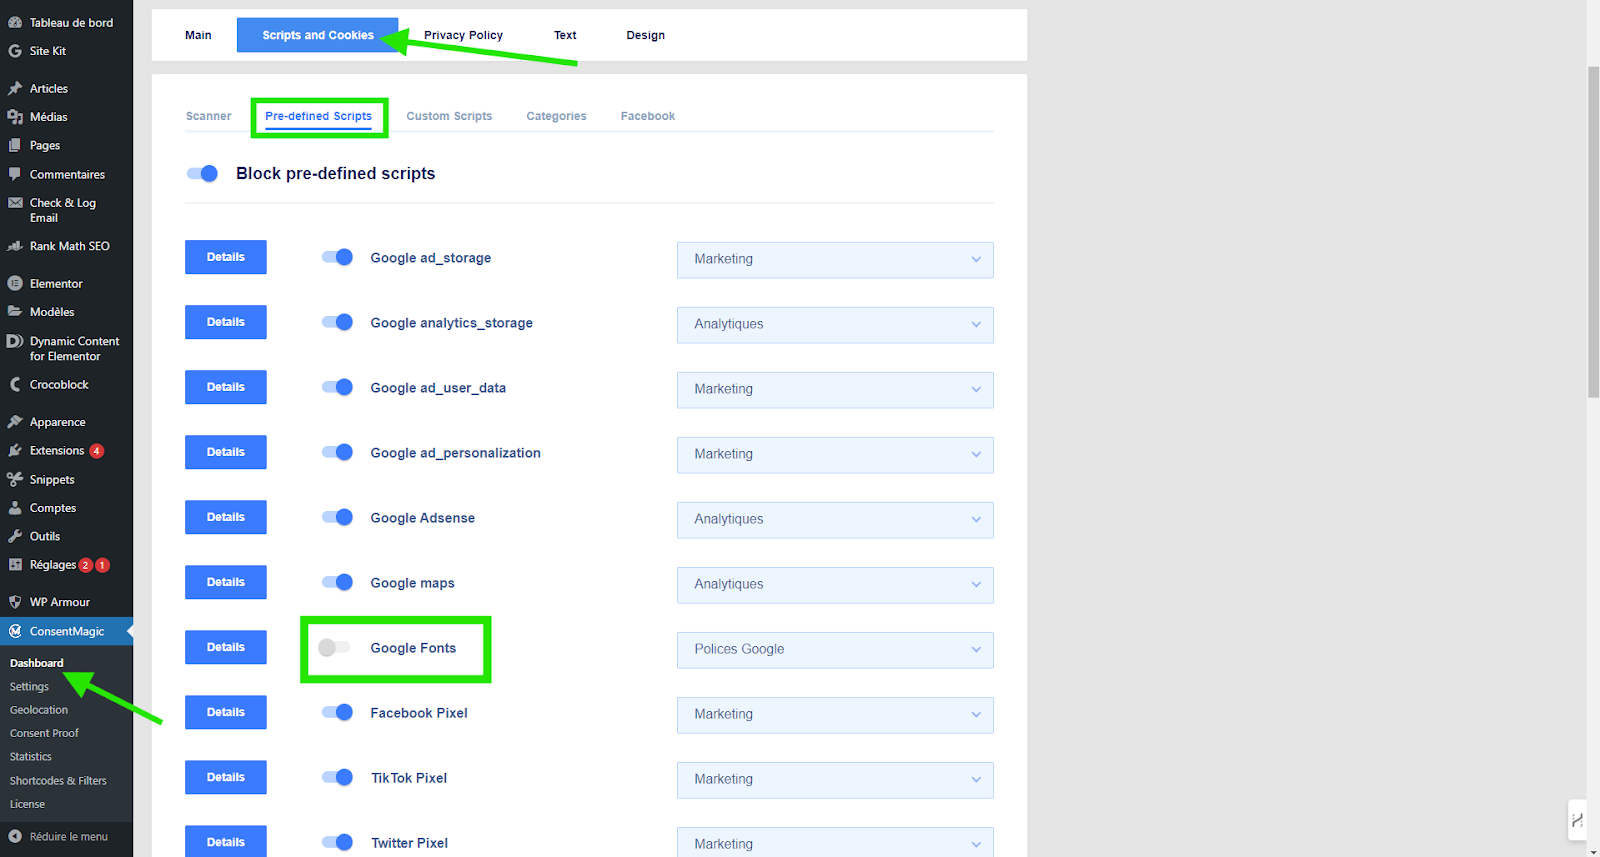
Disable “Google Font” : Disable Google Font in “Scripts and Cookies”. Google Fonts can cause privacy issues because it loads resources from Google’s servers, which can result in the collection of user data, such as IP address. This data collection can cause GDPR compliance issues because it can be considered a form of tracking without the user’s explicit consent.
By disabling Google Fonts and hosting the fonts locally, you avoid these problems and improve your site's compliance with data protection regulations.
Configure consent options : Define the types of consent to collect (analysis, advertising, etc.).
Customize the consent banner:
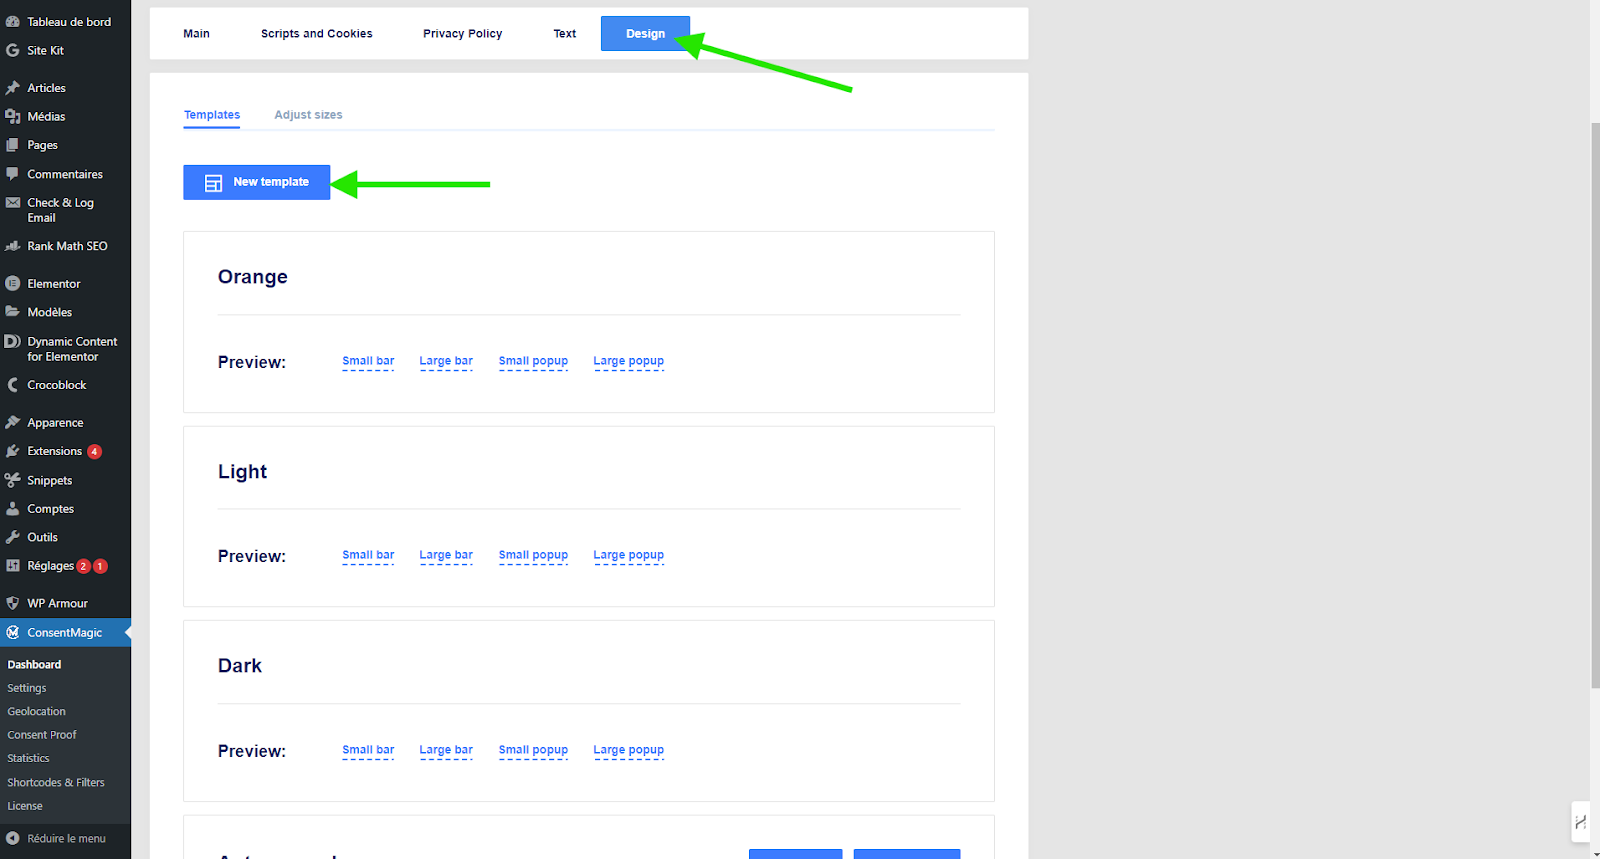
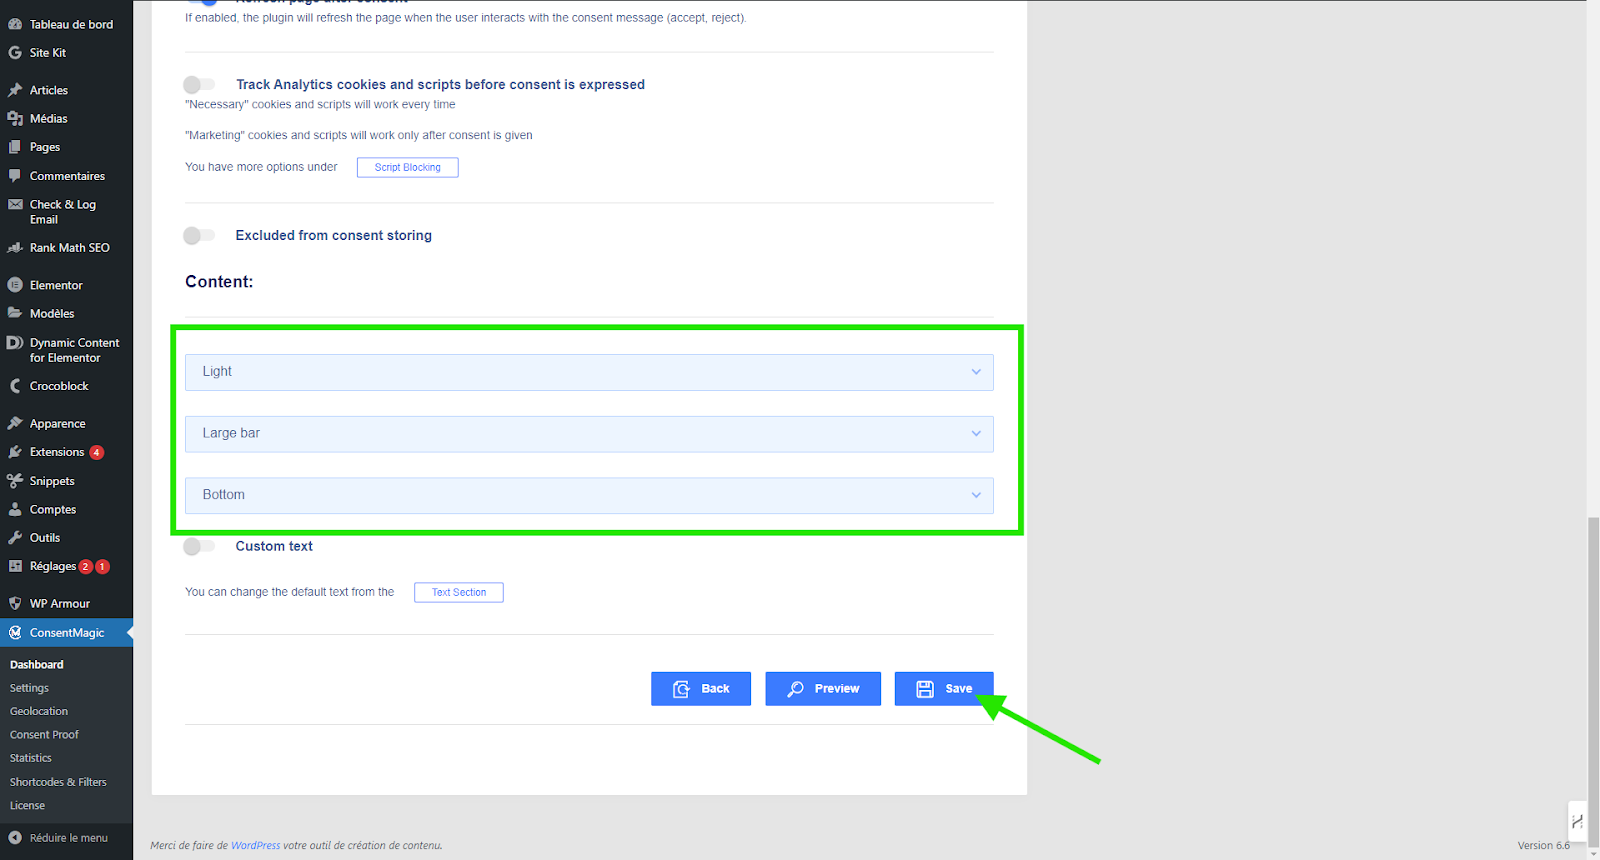
Design and text : Adapt the design (colors, fonts) to match your site by creating a new template in the “Design” tab.
Apply the Design in 3 clicks
Consent messages : Write clear and simple messages explaining the types of data collected and their use. You can also leave the default settings. The texts are already optimized to maximize user experience.
Verification and Testing
Test the consent banner : Access your site in incognito mode to check the banner display and the functioning of the consent choices. You can also use the “Preview” mode to check the consistency of design and text content.
Use GA4 to verify successful activation : Google offers diagnostic tools to check the correct implementation of Google Consent Mode V2. Use these tools to make sure everything is working as expected. But for this article, we'll show you how to check using Google Analytics 4.
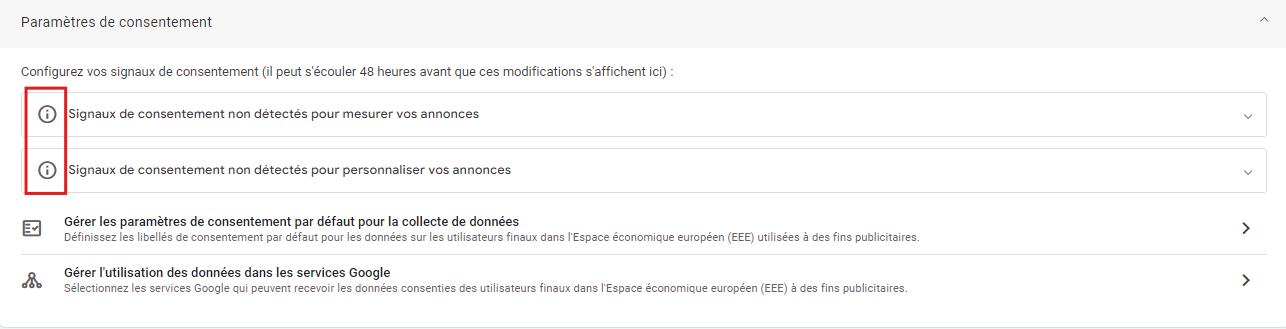
This is what the non-active consent mode looks like in “Data Feed” on GA4.
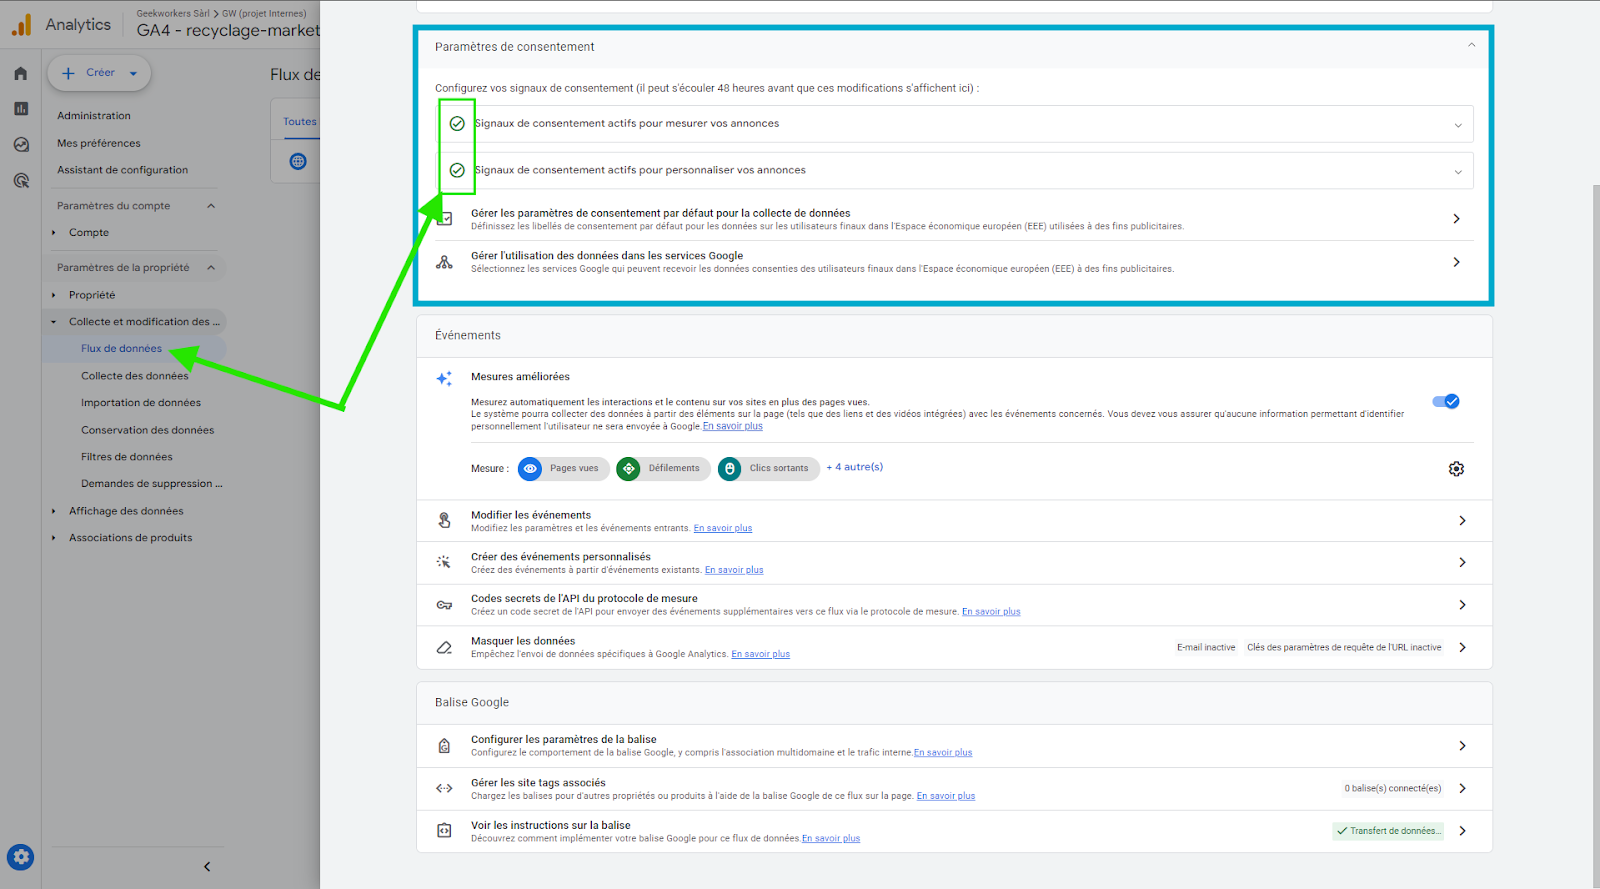
48 hours after activating Consent Mode V2, you should see that the consent signals are active.
Conclusion
Setting up Consent Mode V2 on your WordPress site using the ConsentMagic plugin is a crucial step to comply with data protection regulations.
By following this tutorial, you will not only ensure your site's compliance, but also build trust with your users. Remember to monitor plugin updates and stay informed about regulatory changes to keep your site up to date.
Other articles
Gemini CLI: Revolutionize your development workflows with Google's AI
A huge thank you to Geekworkers for their excellent work on my website. Their responsiveness, professionalism and creativity made all the difference. A smooth collaboration and results beyond my expectations. I highly recommend!
Thank you to Geekworkers for their exceptional work! They understood my vision perfectly and created a landing page exactly as I wanted it. They were professional, creative and responsive throughout the project. I'm delighted with the result, which perfectly reflects the image of my application. I'd highly recommend their services to anyone looking for a quality digital agency!"
A big thank you to Geekworkers for creating my website. Their professionalism, attentiveness and expertise made all the difference. A top team that I highly recommend!
Their responsiveness and help in creating my content were a real advantage. An in-depth analysis of my needs was carried out from the outset and I was given permanent access to the progress of the project.
Don't hesitate to work with them.
GeekWorkers created an effective, modern landing page that was perfectly suited to our objectives. Their team showed great professionalism, and the work was carried out quickly and meticulously. We're delighted with the end result and would highly recommend their services for any web project.
I would like to express my deep appreciation for Geekworkers. Their outstanding customer service, professionalism and commitment to customer satisfaction is truly impressive. My experience has been exceptional and I highly recommend this company. Thank you for your service.
Geekworkers gave me a clear, actionable vision for developing Bobi. Their recommendations on SEO, digital acquisition and platform optimisation were relevant and impactful. A professional and efficient team that I recommend without hesitation! 🚀
We use cookies to improve your experience on our site. By clicking "Accept", you consent to their use.
Features
Always active
Storage or technical access is strictly necessary to enable the use of a specific service explicitly requested by the subscriber or user, or for the sole purpose of transmitting a communication over an electronic communications network.
Preferences
Storage or technical access is necessary for the legitimate purpose of storing preferences not requested by the subscriber or user.
Statistics
Storage or technical access used exclusively for statistical purposes.The technical storage or access that is used exclusively for anonymous statistical purposes. Without a subpoena, voluntary compliance on the part of your Internet Service Provider, or additional records from a third party, information stored or retrieved for this purpose alone cannot usually be used to identify you.
Marketing
Technical storage or access is required to create user profiles in order to send advertisements or to track the user across a website or across websites for similar marketing purposes.